18 Holiday Sleek Bun Hairstyles with Sculpted Center Parts
Glossy center parts, sculpted buns, polished twists, and festive accessories make these sleek holiday hairstyles feel elegant without becoming overly complicated.
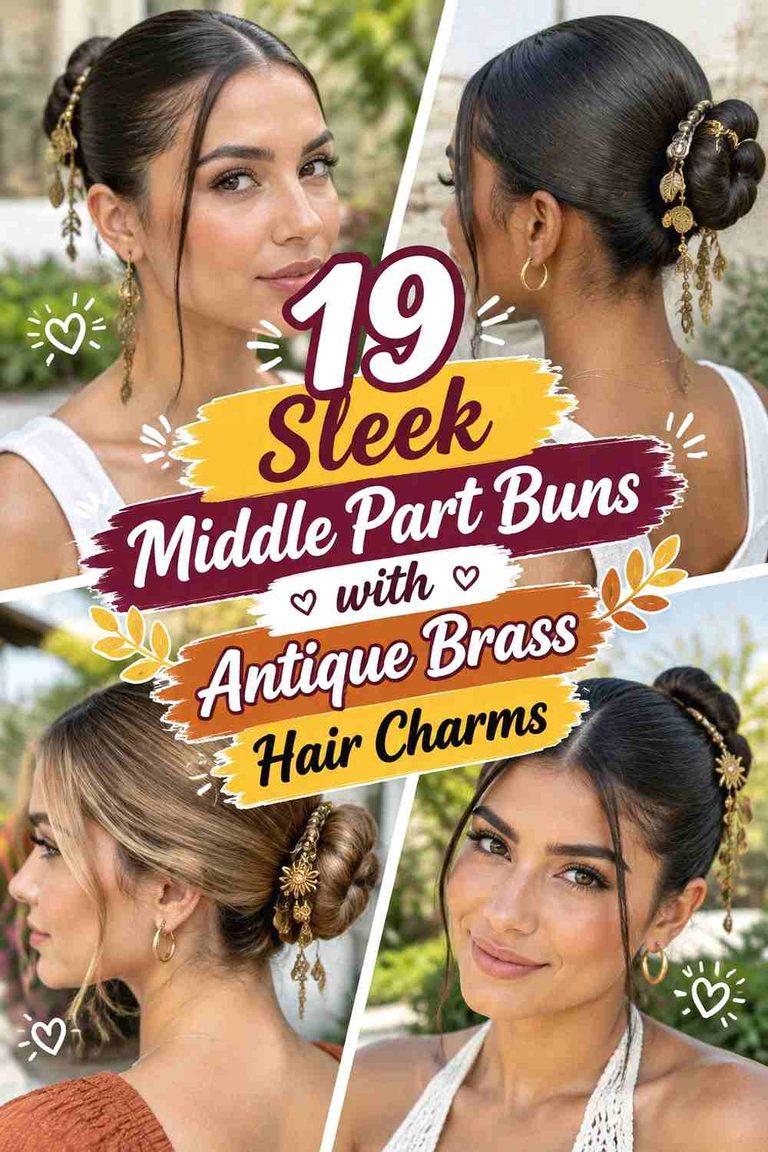
A sleek bun is especially effective for holiday styling because it creates a clean silhouette that works with statement earrings, high necklines, party dresses, and tailored winter outfits. A sharply defined center part adds structure at the front, while the bun placement and construction can shift the look from minimalist to dramatic.
The best version depends on hair length, density, desired hold, and how polished you want the finish. Low buns feel refined and understated, while high or oversized shapes make a stronger statement. Braids, pearls, velvet ribbons, and rhinestone details can add seasonal interest without hiding the sculpted lines of the hairstyle.
Quick List
- Classic Low Sleek Bun Hairstyle
- High Sculpted Holiday Bun Hairstyle
- Braided Low Sleek Bun Hairstyle
- Twisted Center Part Bun Hairstyle
- Pearl Pinned Holiday Bun Hairstyle
- Velvet Ribbon Sleek Bun Hairstyle
- Sculpted Knot Holiday Bun Hairstyle
- Double Twist Sleek Bun Hairstyle
- Glossy Mid Height Bun Hairstyle
- Wrapped Base Holiday Bun Hairstyle
- Curved Side Detail Sleek Bun Hairstyle
- Fine Hair Sculpted Bun Hairstyle
- Thick Hair Sleek Bun Hairstyle
- Mini Braid Accent Bun Hairstyle
- Rhinestone Pinned Holiday Bun Hairstyle
- Soft Tendril Sleek Bun Hairstyle
- Oversized Sculpted Bun Hairstyle
- Minimalist Center Part Holiday Bun Hairstyle
1. Classic Low Sleek Bun Hairstyle
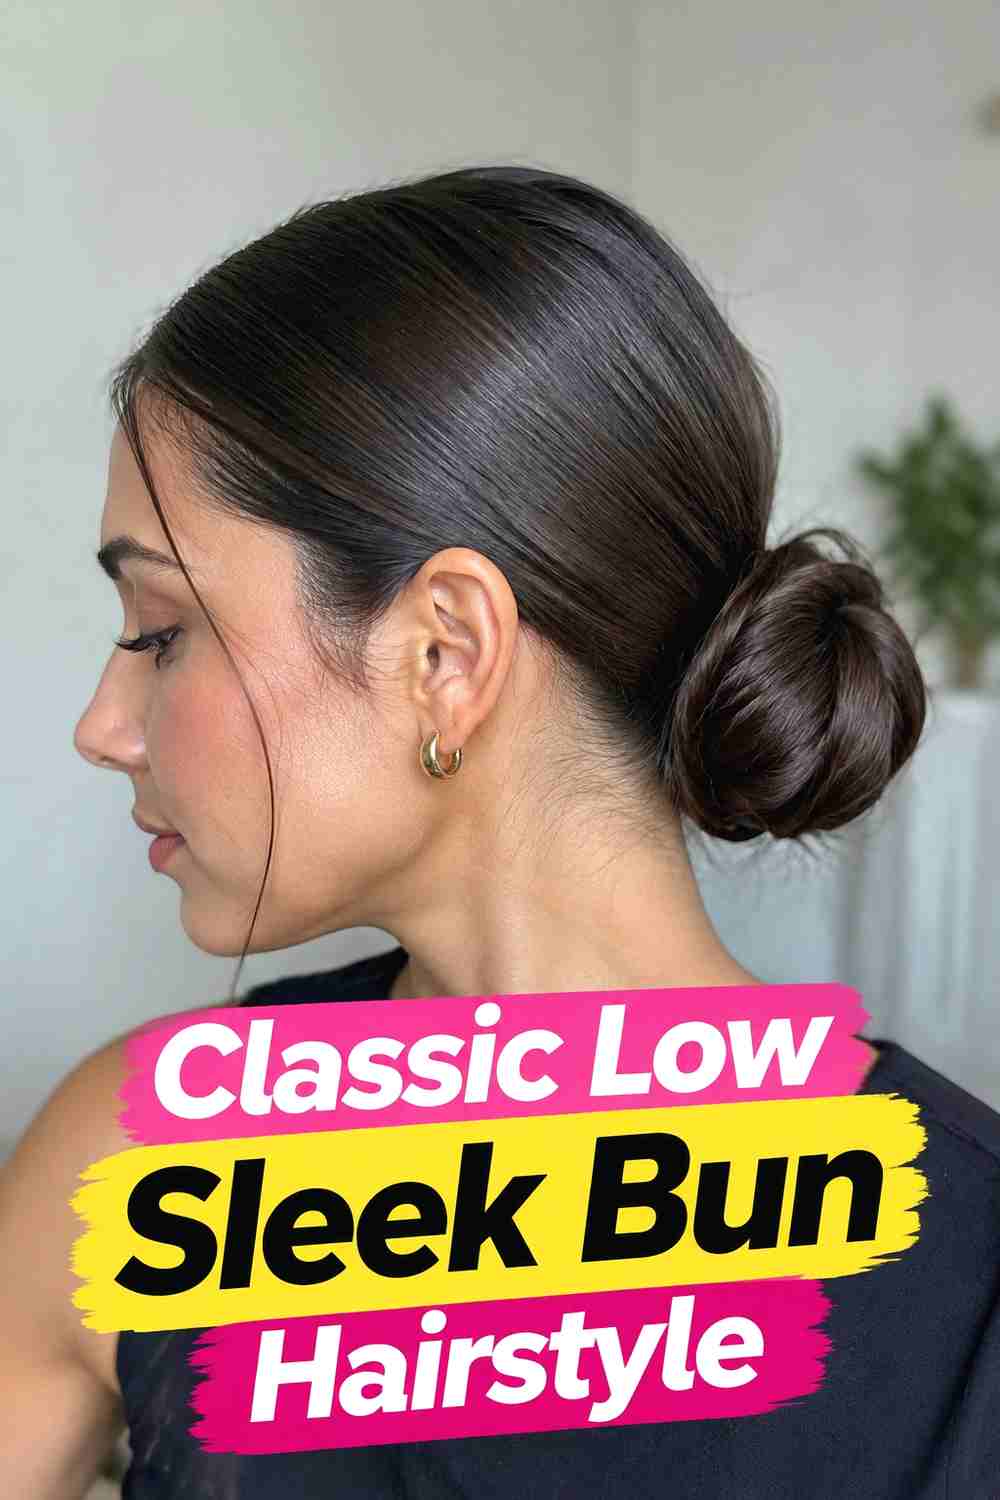
A classic low bun lets the sculpted center part become the main detail at the front. Create a precise part from the hairline toward the crown, then smooth both sides backward with controlled tension before gathering the hair at the nape. The bun itself should remain compact and connected naturally to the ponytail base rather than appearing detached from the head. A polished surface gives the look its holiday-ready finish, but visible natural strand texture keeps it from looking artificial. This simple placement works especially well with statement earrings and high-neck evening outfits because the hair stays clear of the face and shoulders while maintaining a refined silhouette.
Styling Notes
Establish the center part before applying smoothing product so both sides remain balanced. Use a fine brush only where extra control is needed.
Best For
This versatile style suits office parties, dinners, weddings, formal gatherings, and minimalist holiday looks.
2. High Sculpted Holiday Bun Hairstyle
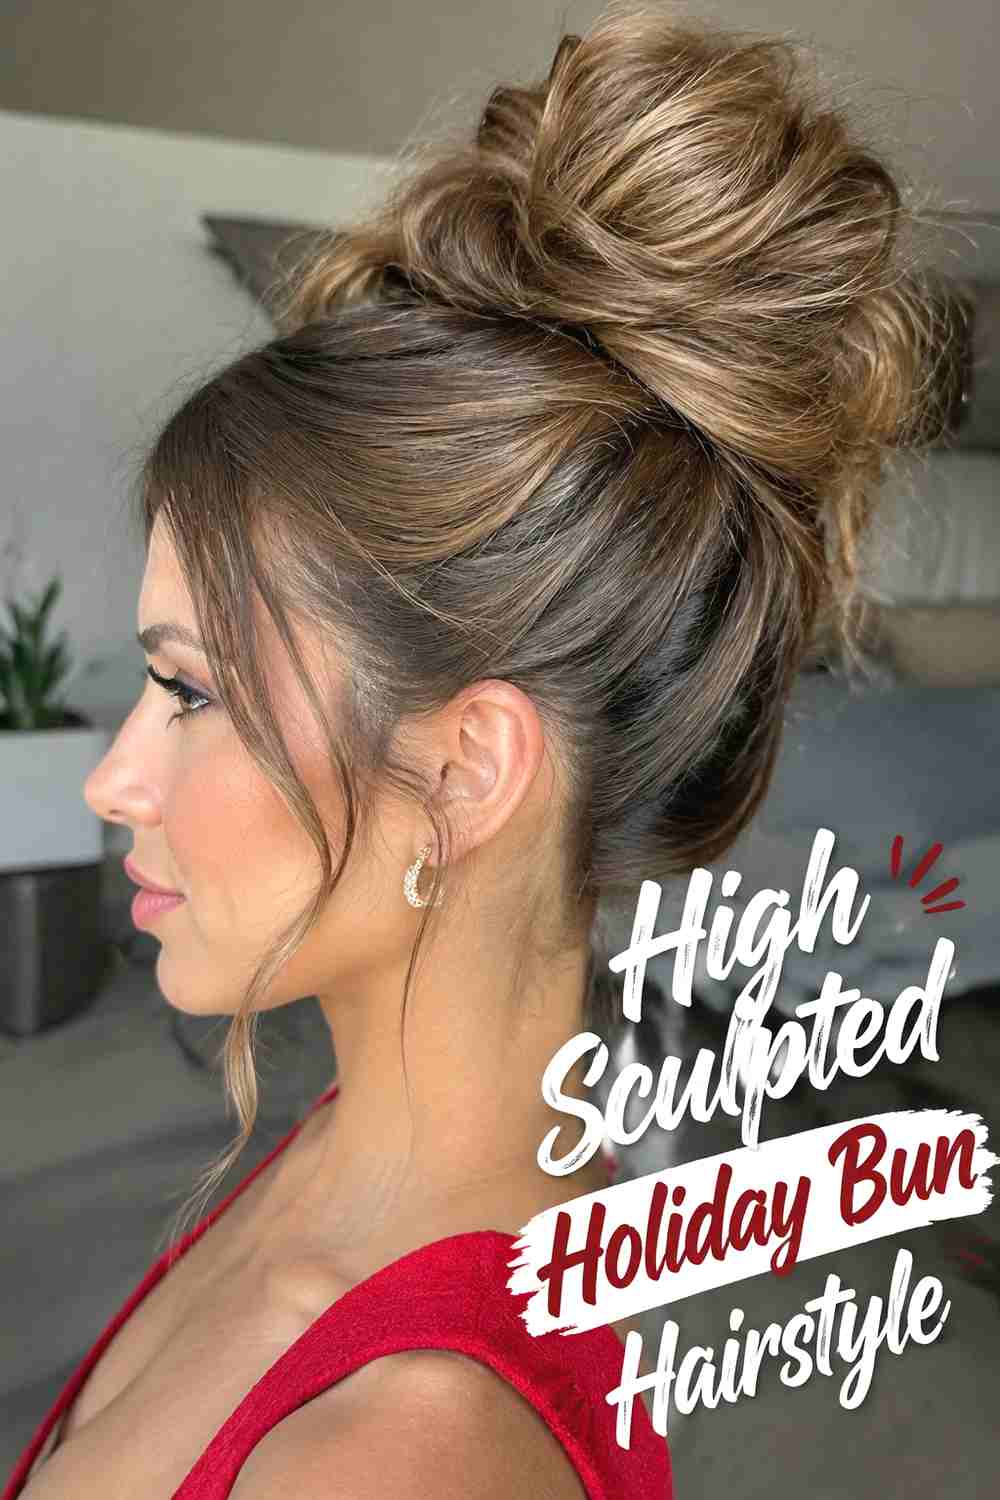
A high sculpted bun creates a more dramatic holiday silhouette while the clean center part keeps the front controlled and symmetrical. Smooth the hair upward without completely erasing its natural density, then secure the ponytail high enough that the bun remains visible from the front. The length can be twisted or folded into a rounded shape, with hidden pins supporting the edges. Keeping the center part sharply defined creates an interesting contrast with the elevated bun. This style can feel particularly striking with open necklines or structured party outfits because it adds height without covering jewelry. Avoid making the bun excessively tight if the hair is heavy or the style needs to last for several hours.
Wear & Maintenance
Distribute pins around the bun rather than relying on one central fastening point, especially with dense hair.
Pro Tip
Secure the ponytail firmly first, then sculpt the bun separately so its shape can be adjusted without disturbing the center part.
3. Braided Low Sleek Bun Hairstyle
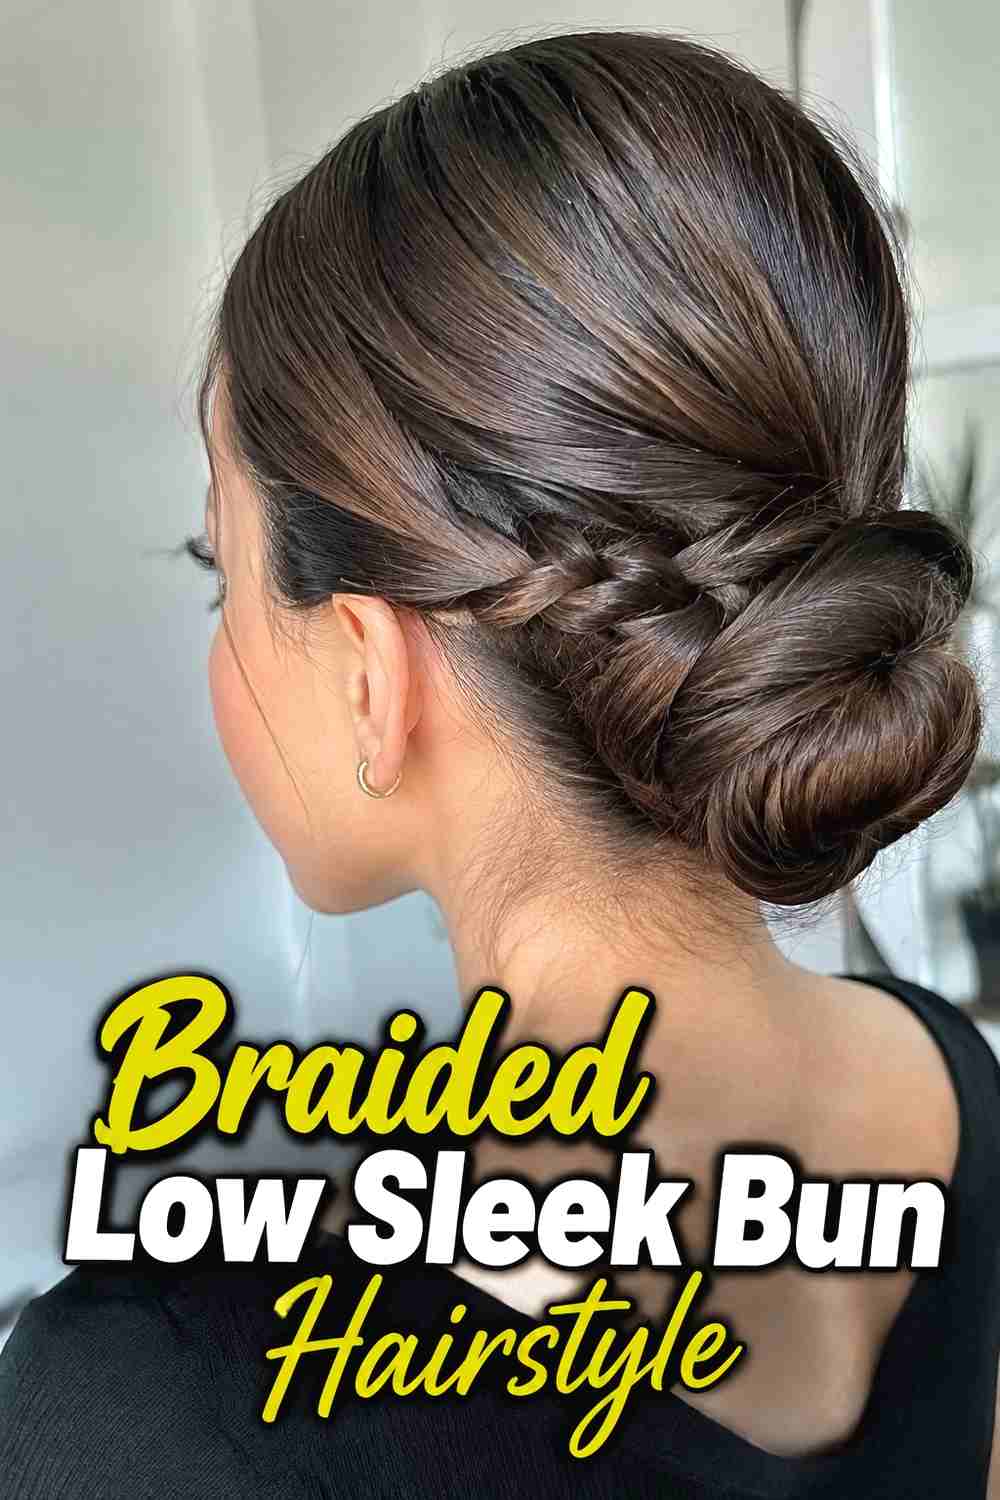
A braided low bun adds visible texture to an otherwise smooth holiday hairstyle. Begin with a sharp center part and sleek the hair toward a low ponytail, keeping both front sections clean and evenly directed. Braid the ponytail before wrapping it around the base so the woven pattern remains visible across the finished bun. On thick hair, a simple three-strand braid creates plenty of dimension, while finer hair can be loosened slightly before wrapping. The contrast between the glossy crown and textured bun makes this style interesting without requiring decorative accessories. Keep the braid securely connected to the base so the finished shape feels physically believable rather than loosely perched at the nape.
Styling Notes
Braid with moderate tension first, then soften selected outer sections before wrapping if additional volume is needed.
Best For
Choose this style when you want texture and detail while maintaining a polished holiday appearance.
4. Twisted Center Part Bun Hairstyle
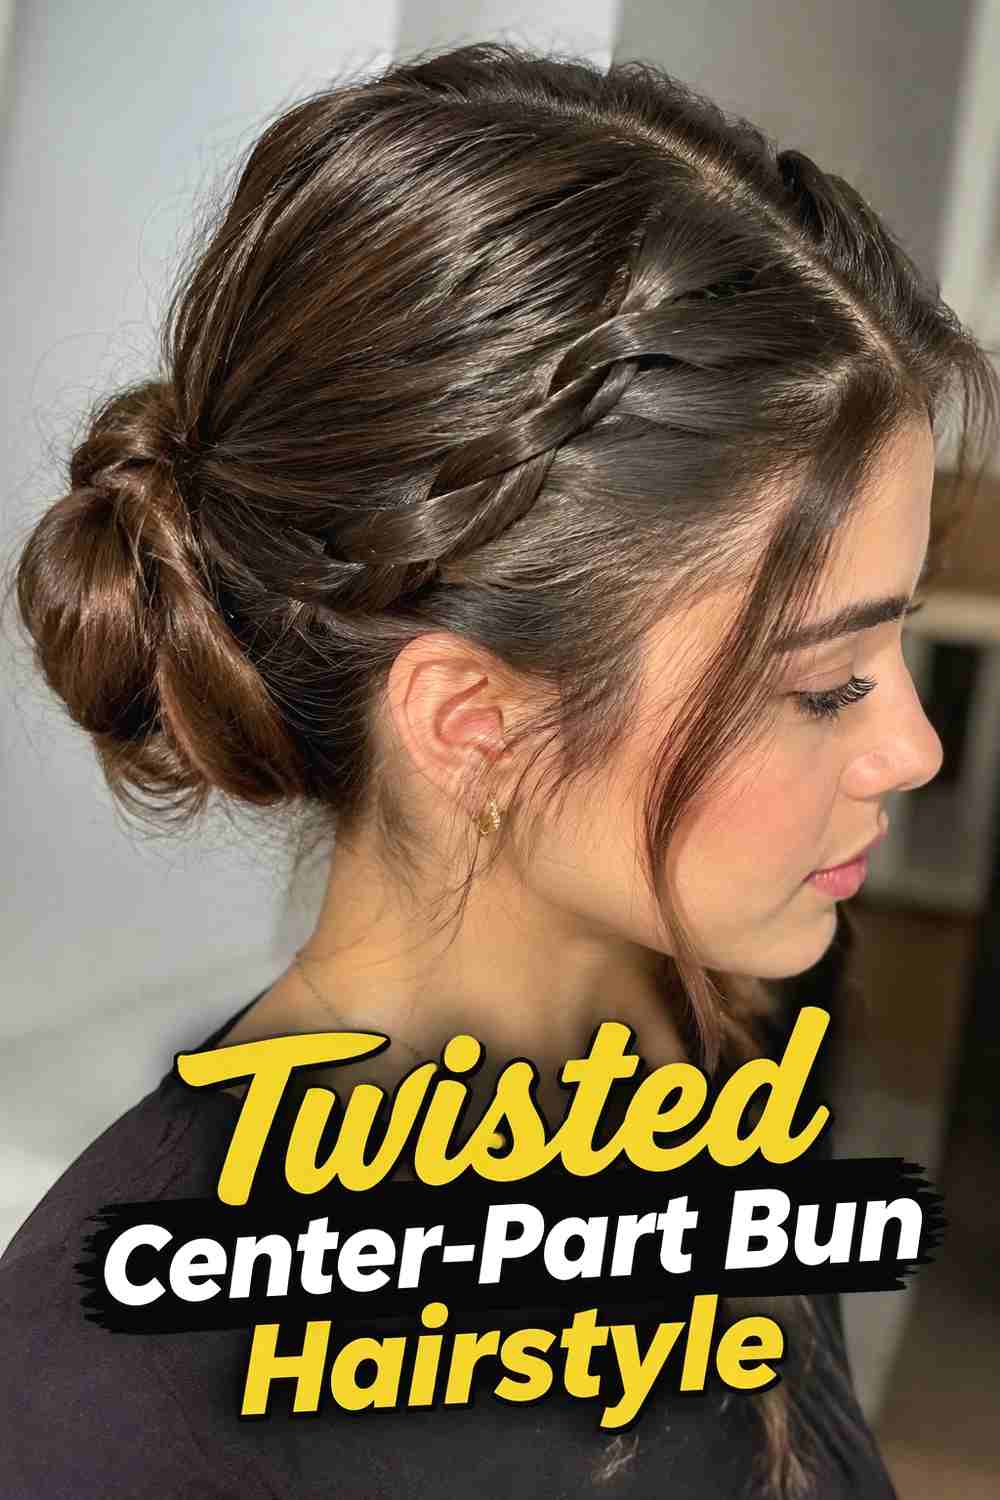
A twisted bun creates elegant movement at the back while a sculpted center part keeps the front sharply defined. Gather the smoothed hair low or at mid-height, divide the ponytail into sections, and twist them individually before arranging them around the base. This construction creates overlapping curves instead of one continuous coil, making the bun look detailed from several angles. Keep the twists controlled enough that the surface remains polished but not so tight that the texture disappears. The center part should stay clean from the hairline backward, with both sides following the natural shape of the head. This is a sophisticated option when you want more dimension than a classic round bun.
Styling Notes
Pin each twist separately as you build the shape. This gives you greater control over balance and prevents the entire bun from loosening at once.
Why It Works
The front remains minimal while the twisted back adds enough visual detail for festive styling.
5. Pearl Pinned Holiday Bun Hairstyle
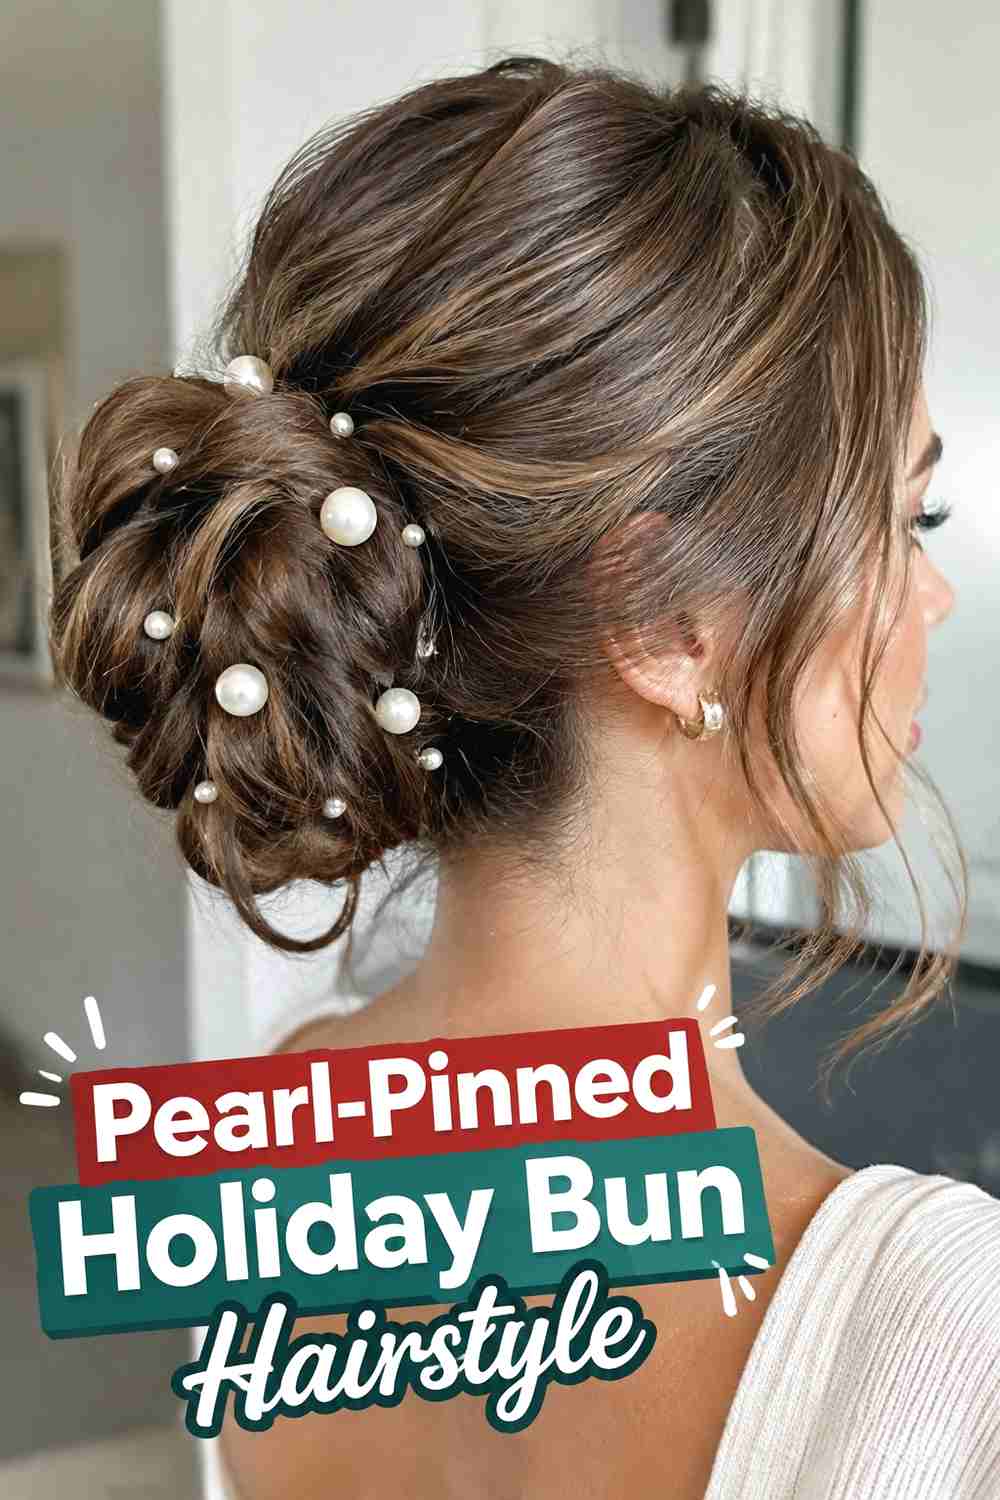
Pearl pins add a festive detail to a sleek center-part bun without competing with its clean shape. Start with a polished low or mid-height bun, then place a few pearls along one edge, around the base, or through selected sections of the twist. Avoid covering the entire bun; spaced placement allows both the hair texture and accessory details to remain visible. The center part should stay crisp and symmetrical, creating a refined front view while the pearls provide interest from the side and back. This combination works beautifully with simple dresses or monochrome outfits because the hairstyle adds ornamentation without becoming overly elaborate or visually crowded.
Best For
This version is especially suitable for holiday weddings, dinners, formal parties, engagement events, and seasonal portraits.
Pro Tip
Build the hairstyle with ordinary pins first and treat pearl pins as decoration rather than structural support.
6. Velvet Ribbon Sleek Bun Hairstyle
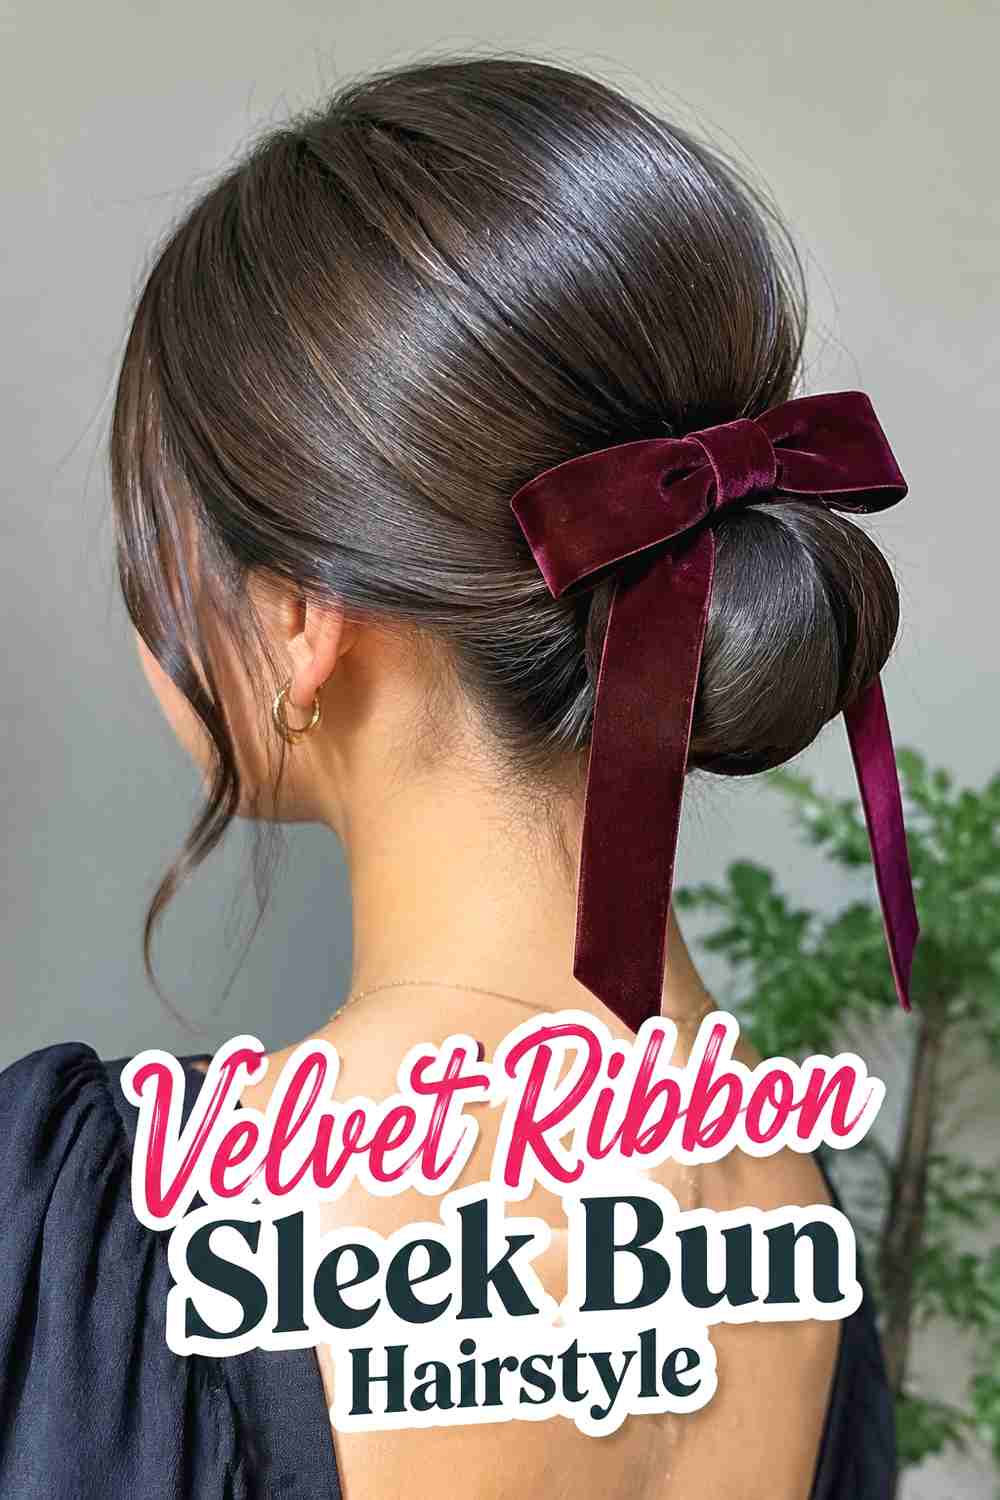
A velvet ribbon gives a sculpted sleek bun a softer seasonal finish while preserving its polished center part. Create the bun first and secure it completely, then tie a narrow ribbon around the base or form a small bow just beneath it. Burgundy, forest green, navy, chocolate, or black velvet can create a rich winter feel without overwhelming the hairstyle. Keep the ribbon proportional to the bun so the clean shape remains visible. The front should stay smooth and symmetrical, with the center part acting as a strong line that balances the softer fabric detail at the back. This contrast makes the look festive while still feeling wearable beyond a themed holiday party.
Styling Notes
Use an elastic and pins for all structural hold before adding the ribbon. Velvet can slip or compress if it is asked to secure heavy hair.
Best For
Choose this look for holiday dinners, family photos, winter celebrations, or romantic seasonal styling.
7. Sculpted Knot Holiday Bun Hairstyle
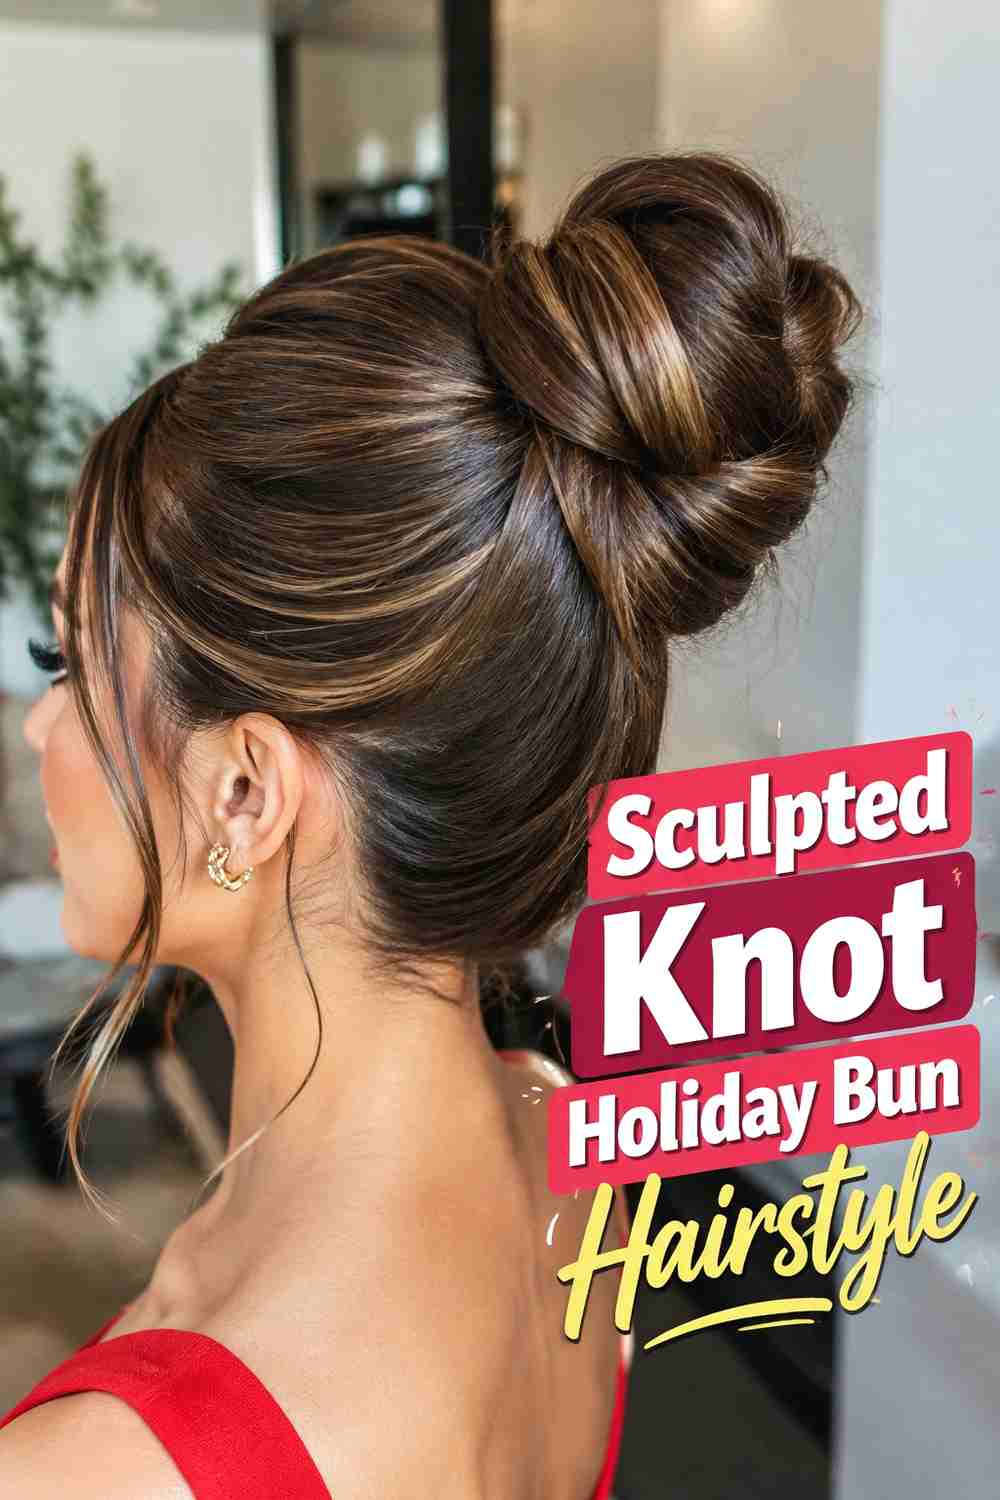
A sculpted knot replaces the traditional round bun with a folded shape that feels modern and architectural. After creating the precise center part, smooth the hair into a low or mid-height ponytail and fold the length into overlapping loops rather than winding it into a simple circle. Hidden pins can secure each curve so the final knot appears intentional and balanced. Keep the surface polished enough to emphasize the shape, but avoid coating the hair so heavily that individual strands disappear. The result is especially effective from the side and back, where the knot’s structure becomes more visible. From the front, the clean center part maintains a minimalist holiday elegance.
Styling Notes
Build the knot one section at a time and check the silhouette from multiple angles before adding final pins.
Wear & Maintenance
A strong ponytail base is important because the sculpted shape depends on a secure anchor point.
8. Double Twist Sleek Bun Hairstyle
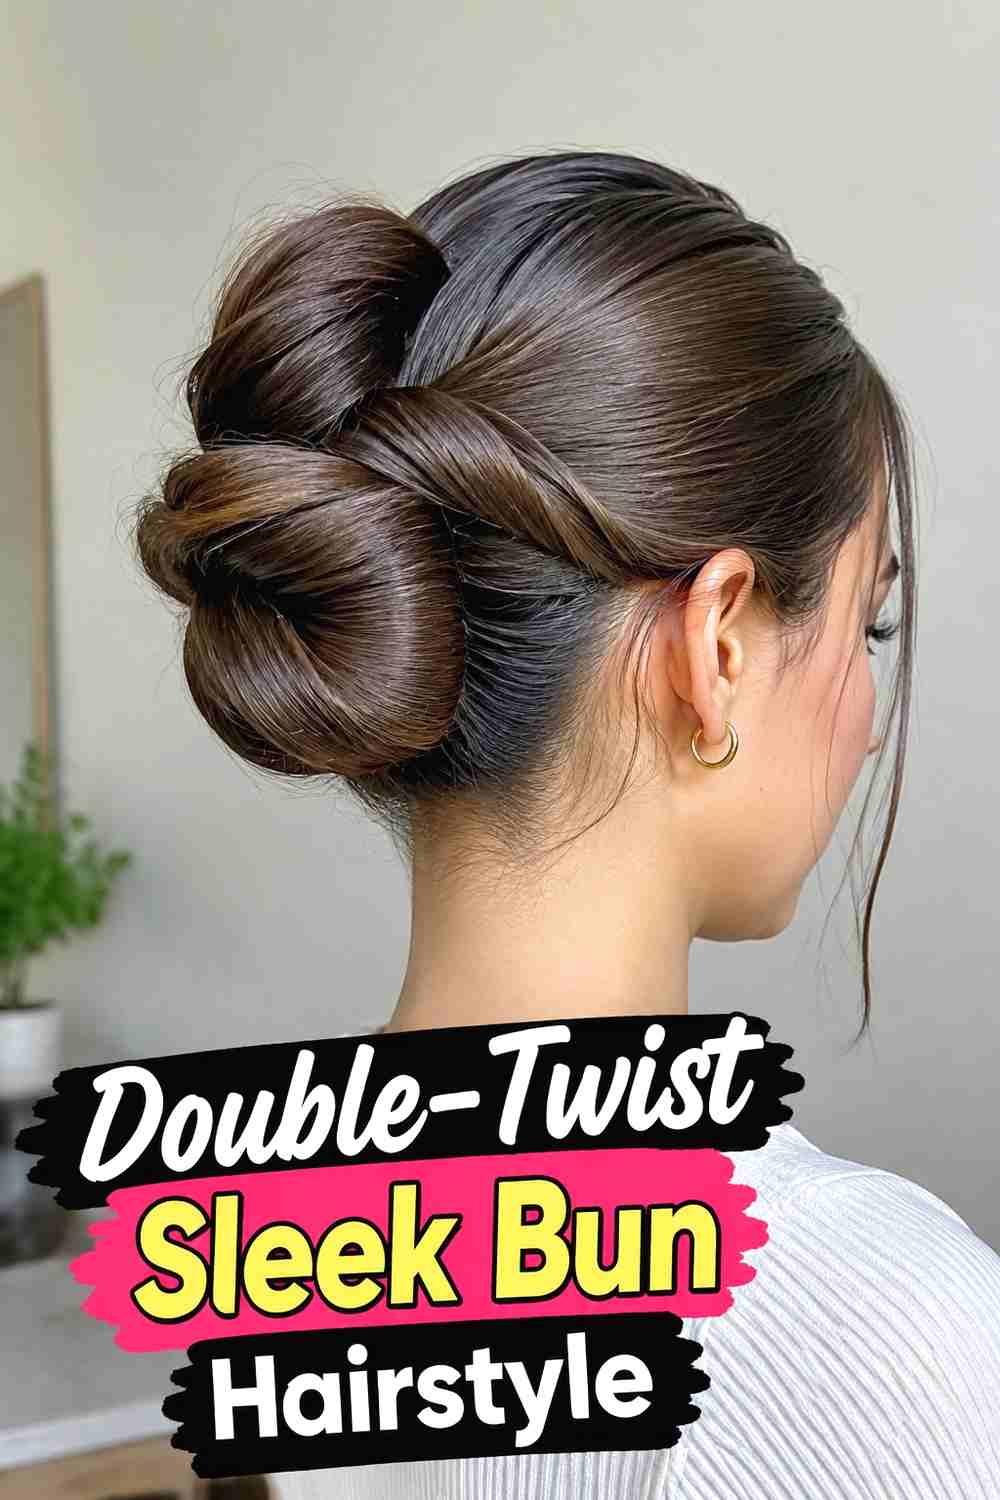
A double-twist bun uses two controlled sections to create a symmetrical, detailed finish behind a sculpted center part. Once the hair is smoothed into a low ponytail, divide it evenly and twist each half before curving the sections around the base in opposite directions. The finished design can resemble two interlocking loops, giving the bun more definition than a single coil. Keep both twists connected closely to the head so the shape remains secure throughout an evening event. The smooth crown and precise center line provide visual discipline at the front, while the two-part construction introduces movement at the back without requiring accessories or complicated braiding.
Styling Notes
Match the tension of both twists as closely as possible so one side does not appear noticeably tighter or smaller.
Why It Works
The mirrored construction echoes the symmetry of the center part, creating a particularly balanced holiday hairstyle.
9. Glossy Mid Height Bun Hairstyle
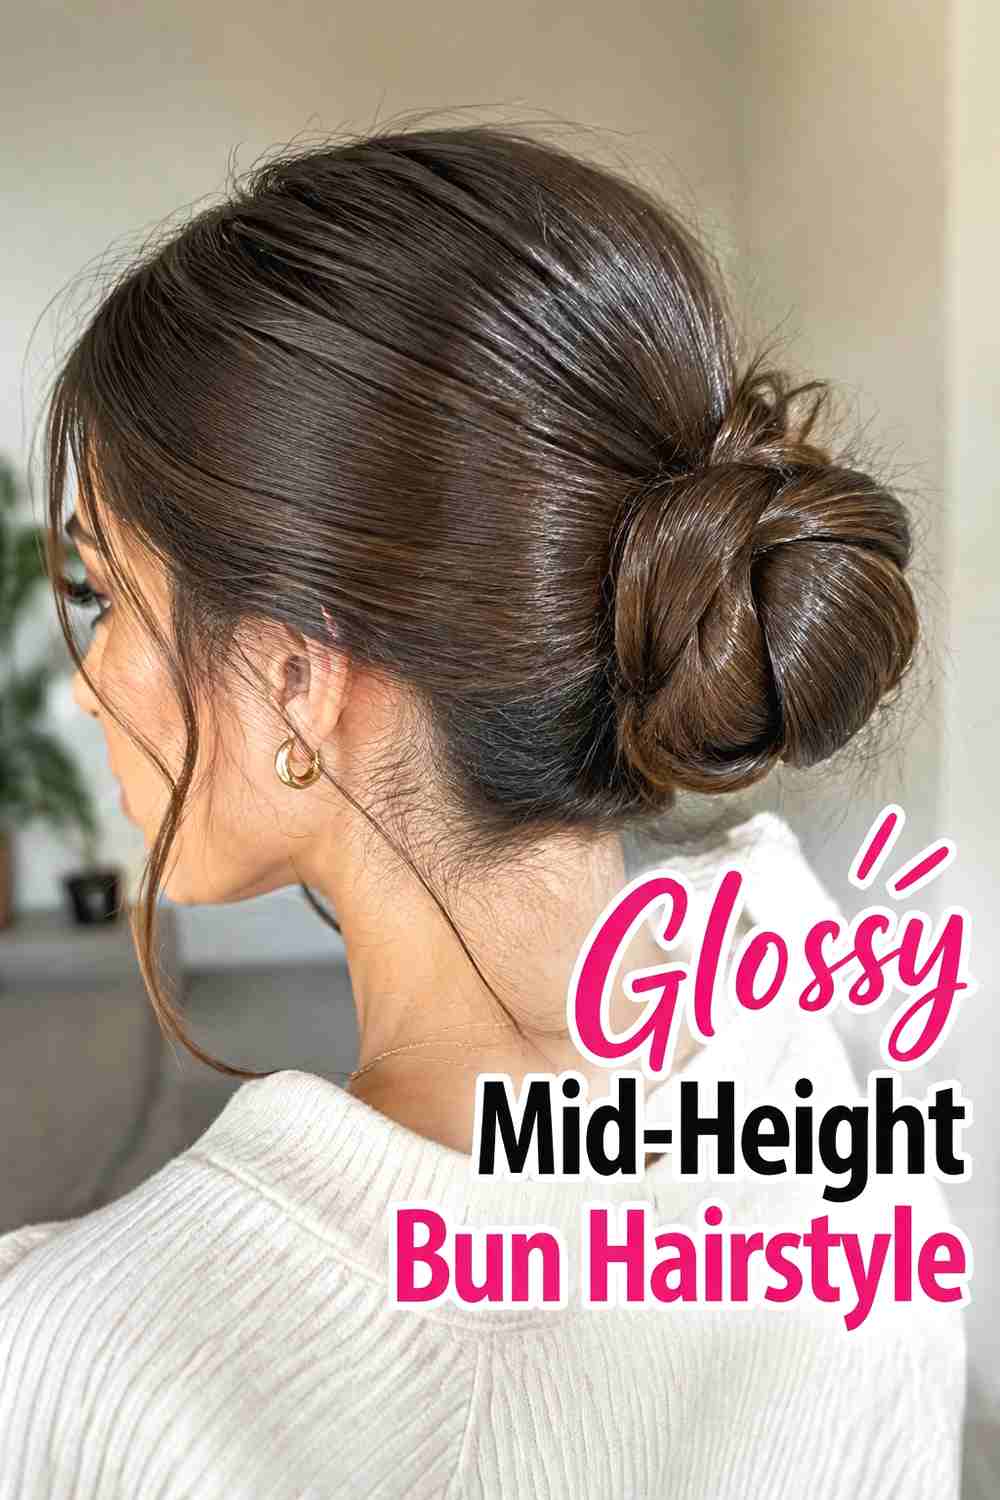
A mid-height bun sits between a low nape style and a high top bun, creating a polished placement that works well with many holiday outfits. Define the center part carefully, smooth both sides backward, and place the ponytail near the middle of the back of the head. The bun can be rounded or slightly flattened depending on hair density. A controlled glossy finish emphasizes the clean part and sculpted surface, but use shine product sparingly so the hair still shows natural strand detail. This placement can feel lighter than a low bun against high collars while remaining less dramatic than a high bun, making it a versatile choice for dinners, office celebrations, and formal gatherings.
Styling Notes
Apply finishing serum mainly over the surface after the bun is secured instead of saturating the hair before styling.
Best For
This placement is useful when you want polished structure without the formality of a very low bun or the height of a top bun.
10. Wrapped Base Holiday Bun Hairstyle
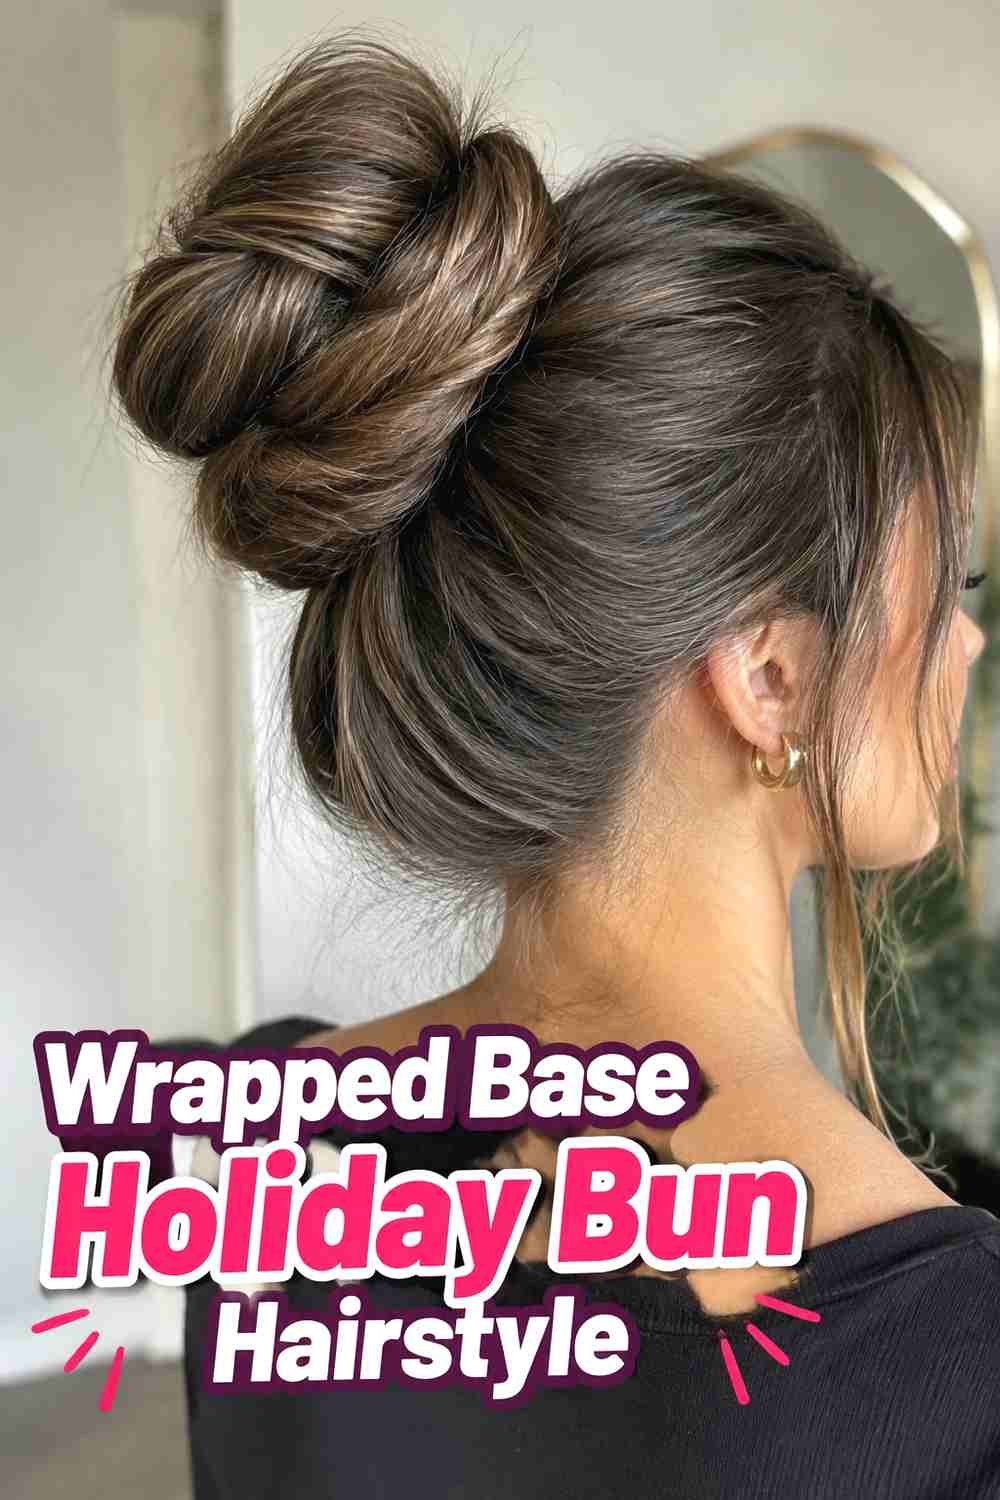
A wrapped base creates a seamless transition between a sleek ponytail and the sculpted bun above it. Begin with a sharp center part and smooth the hair backward into a low or mid-height ponytail. After forming the bun, reserve or separate a slim section of hair and wrap it neatly around the fastening point to conceal elastics and pins. The wrap should lie flat and connect naturally to the bun rather than looking like an added band. This small detail can make a simple shape appear much more finished, especially in close-up holiday photos. Keep the overall silhouette compact so the wrapped base remains visible without competing with an oversized bun.
Styling Notes
Secure the end of the wrapped section underneath the bun with a small pin placed in the direction of the hair.
Pro Tip
Use a slightly wider wrap on thick hair so the detail remains proportional to the bun’s volume.
11. Curved Side Detail Sleek Bun Hairstyle
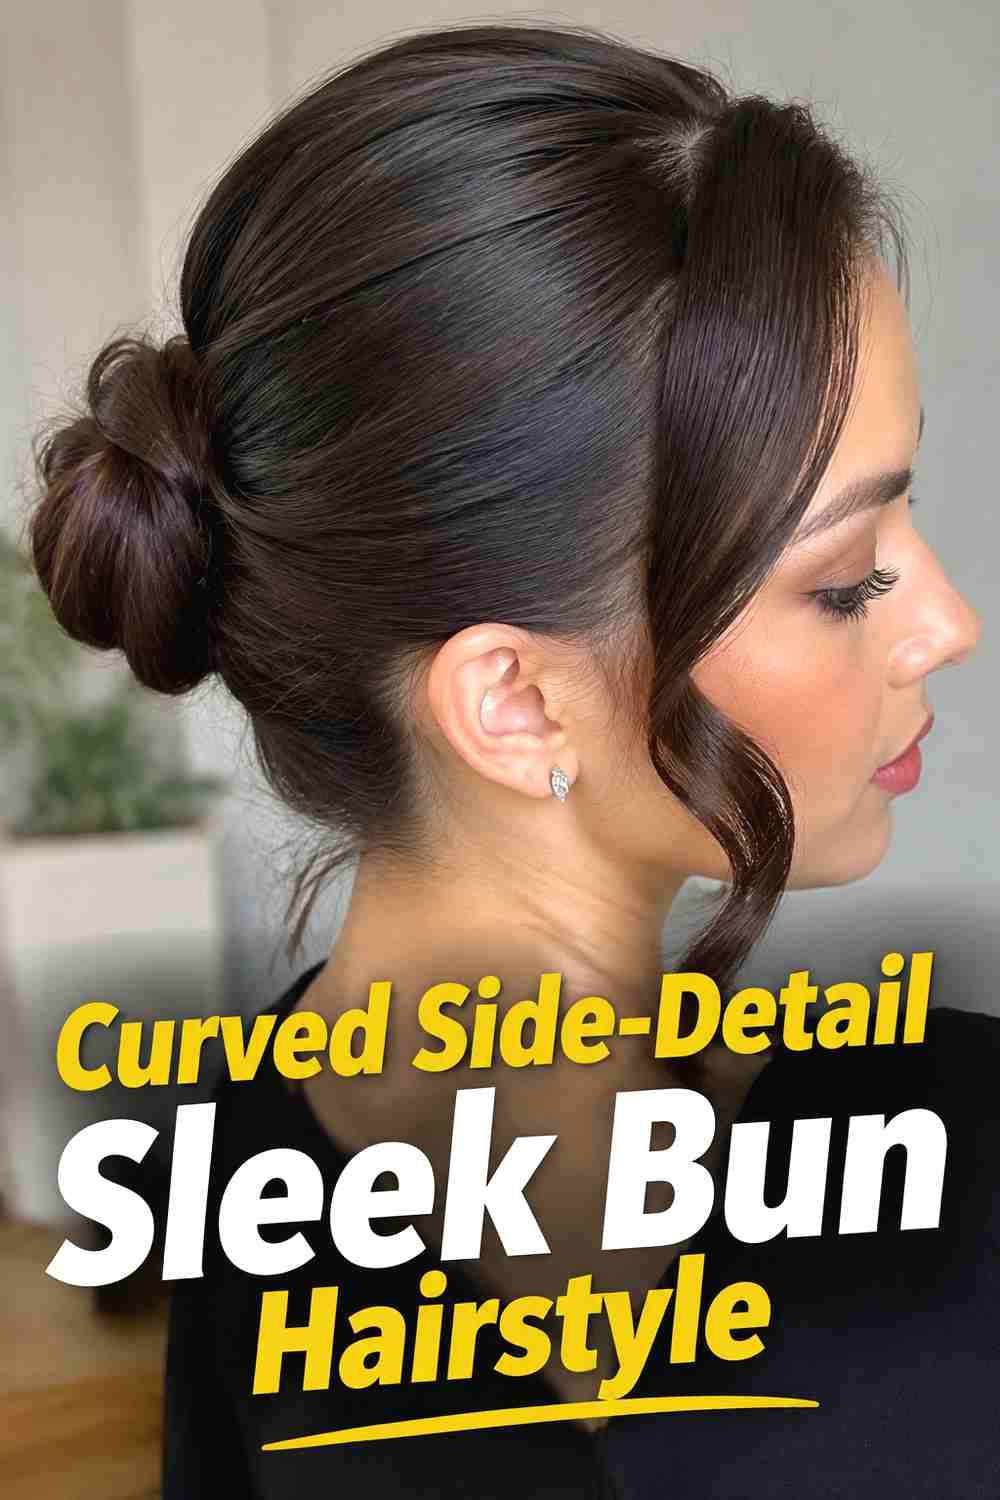
This version keeps the center part precise but adds a subtle curved section along one side before the hair reaches the bun. Instead of directing every strand straight backward, shape a controlled sweep that follows the contour above the ear and disappears into the fastening point. The opposite side can remain simpler, giving the hairstyle visual interest while preserving the center-part structure. Keep the curve smooth and connected to the rest of the hair so it looks intentional rather than like a loose piece. At the back, a compact low bun maintains the polished silhouette. This small directional detail is especially effective when you want a sleek holiday look with a little asymmetry.
Styling Notes
Shape the curved section before securing the final ponytail. Once the base is tight, changing the direction becomes more difficult.
Best For
Choose this look if a completely symmetrical sleek bun feels too minimal but you still want a controlled front finish.
12. Fine Hair Sculpted Bun Hairstyle
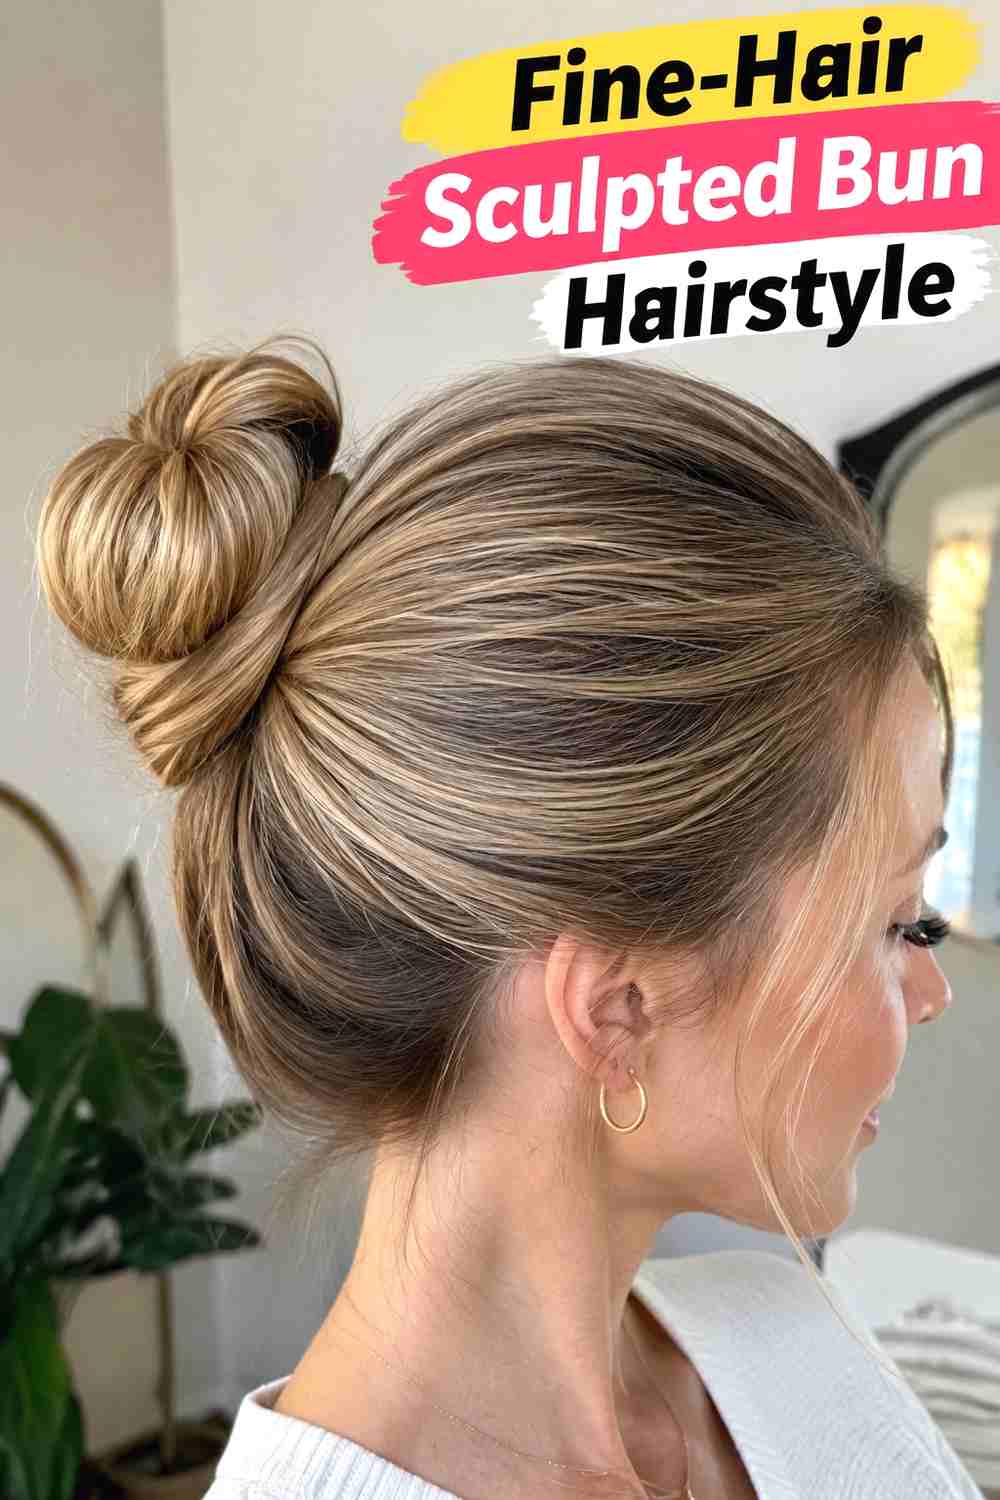
Fine hair can create a sleek sculpted bun when the styling preserves density instead of pulling every section overly tight. Keep the center part precise and smooth the sides with lightweight product, then gather the hair into a secure low or mid-height ponytail. Rather than twisting the length into a tiny compact coil, fold it into a broader loop or layered knot to create more visible shape. Small hidden pins can support the edges without flattening the bun. Avoid heavy oils, which may reduce volume and make fine strands separate at the scalp. The finished look should remain polished while allowing the bun to appear balanced with the clean, narrow lines of the front.
Hair Type & Length
Fine medium-long and long hair can work well, especially when the ends retain enough density to create a smooth folded shape.
Pro Tip
Use lightweight grip or texture product through the ponytail before forming the bun rather than loading the roots with heavy styling product.
13. Thick Hair Sleek Bun Hairstyle
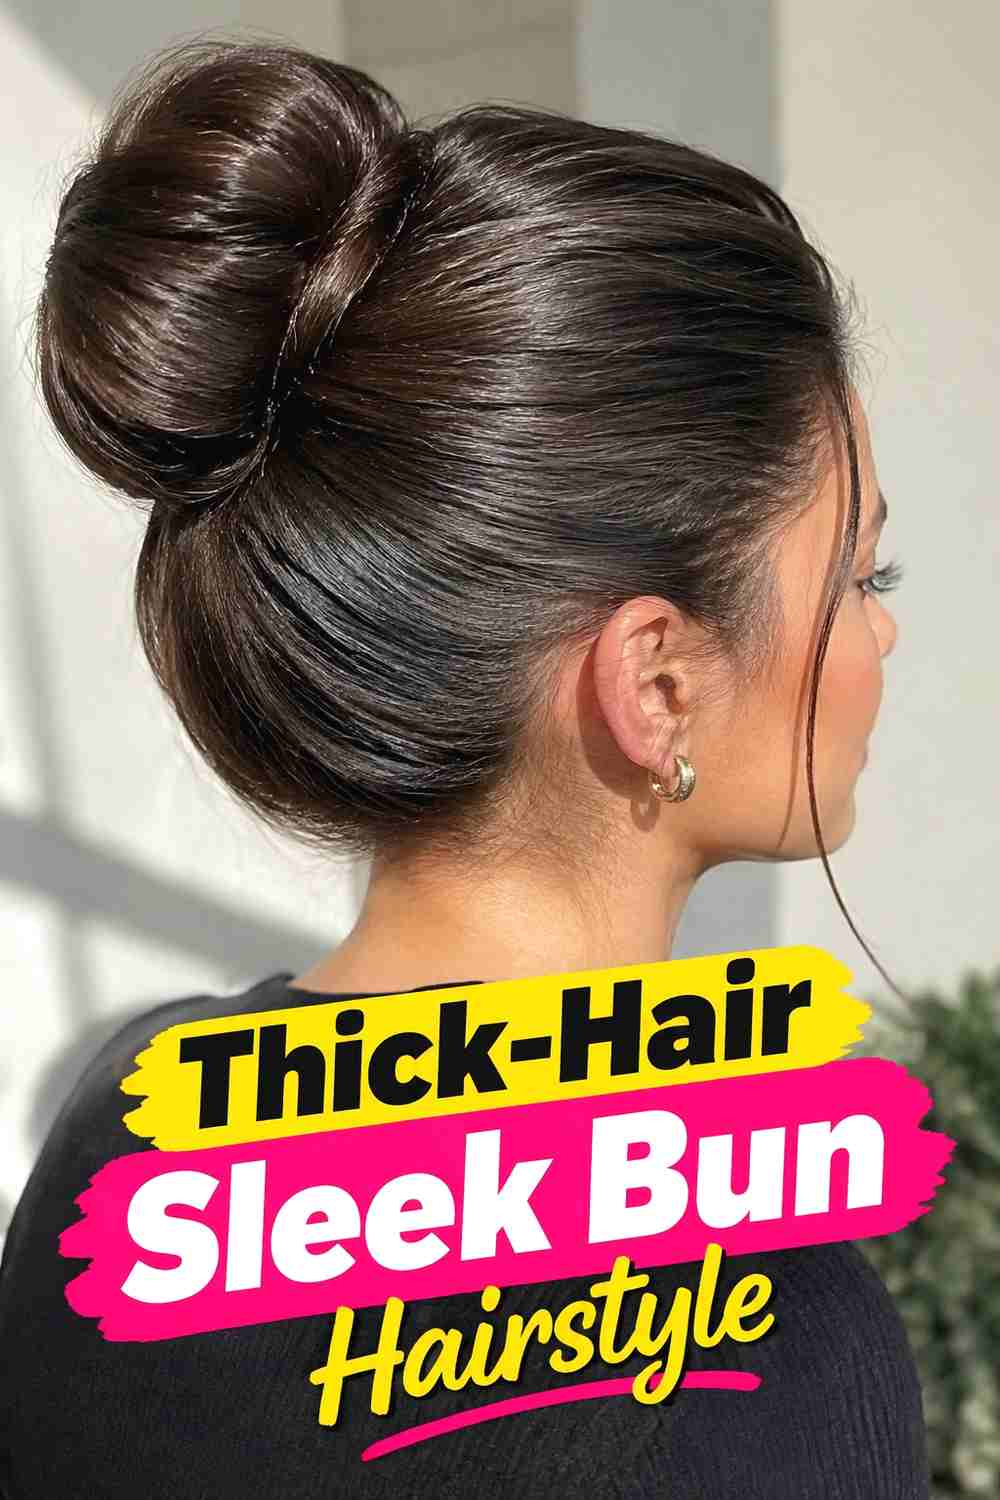
Thick hair produces a substantial sleek bun, but controlled sectioning helps keep the shape elegant instead of oversized by default. Create the center part first, then smooth the crown and sides in stages so dense sections lie evenly without excessive tension. Once the ponytail is secure, divide the length before wrapping or folding it into the bun. This distributes the weight and gives you more control over the final silhouette. A broader low or mid-height bun often feels more balanced than forcing thick hair into a very tight knot. Keep the surface polished, but allow enough natural strand definition to prevent the hairstyle from looking coated or artificial.
Styling Notes
Work in sections when smoothing and building the bun. Trying to control all the density at once can create uneven tension and hidden bumps.
Wear & Maintenance
Use multiple sturdy anchor pins so the weight is distributed comfortably throughout the style.
14. Mini Braid Accent Bun Hairstyle
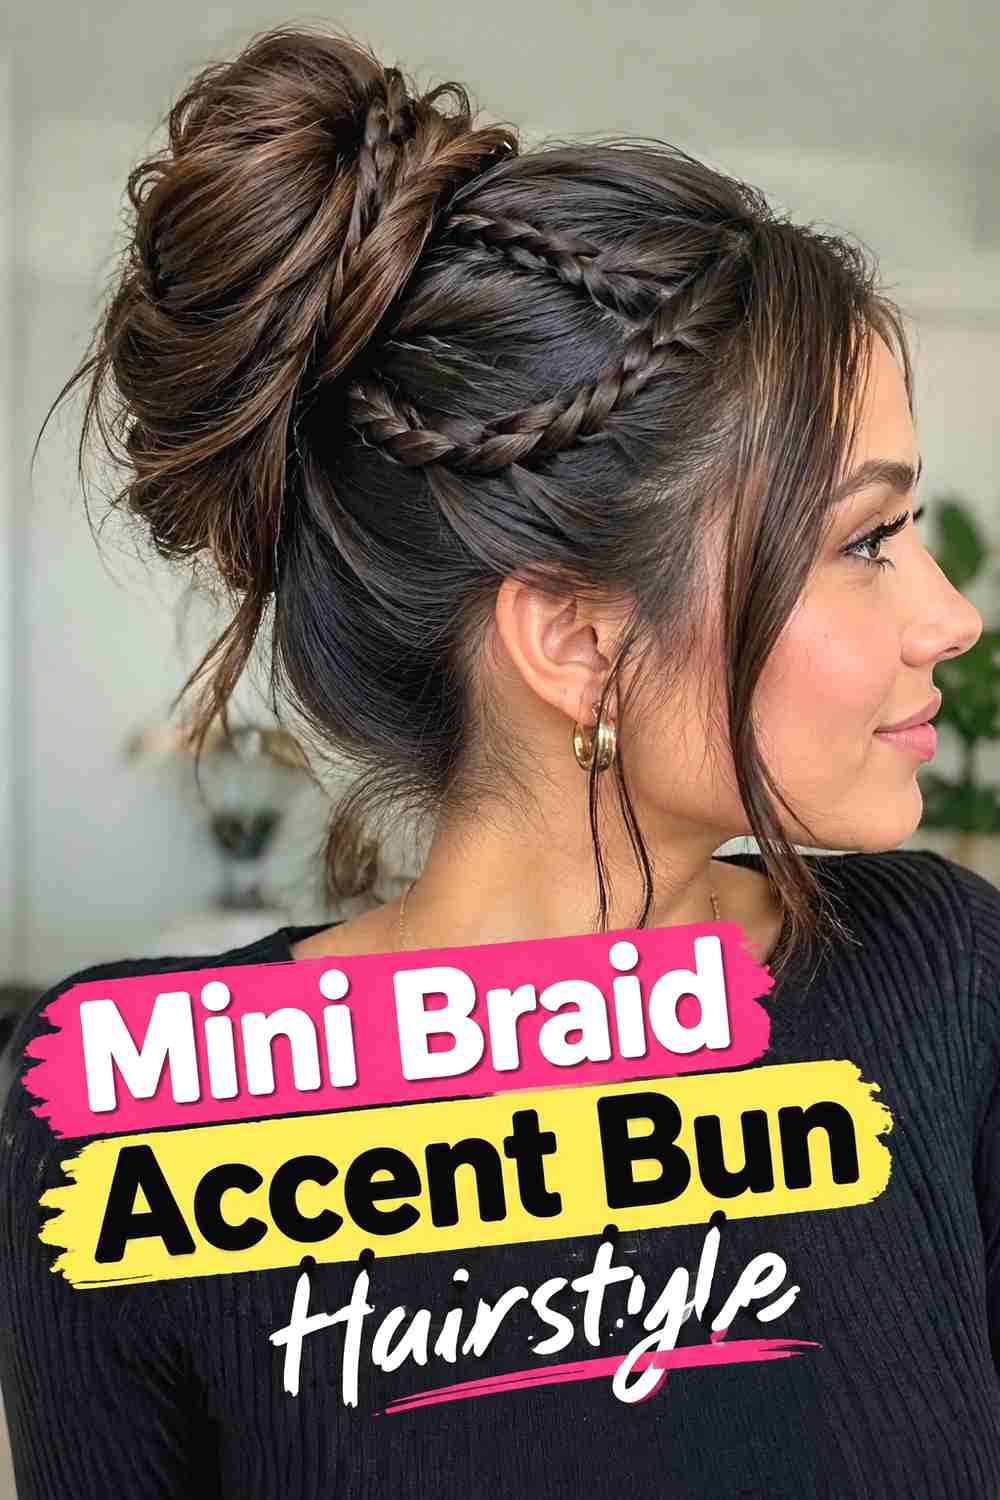
A miniature braid adds a subtle textured accent to a sleek holiday bun without disrupting the sculpted center part. After smoothing the hair into a ponytail, separate a narrow section and braid it before forming the main bun. The small braid can wrap around the base, curve across one edge, or disappear beneath a folded section for a more understated detail. Keep the remaining hair smooth so the braid stands out through contrast rather than size. This approach works particularly well if you want something more detailed than a plain bun but less decorative than pearls or rhinestones. The finished design remains clean enough for formal events while offering extra interest from the back.
Styling Notes
Choose a narrow braid section so the main bun retains enough density and stays visually balanced.
Why It Works
The braid adds texture without interrupting the crisp center part or streamlined front silhouette.
15. Rhinestone Pinned Holiday Bun Hairstyle
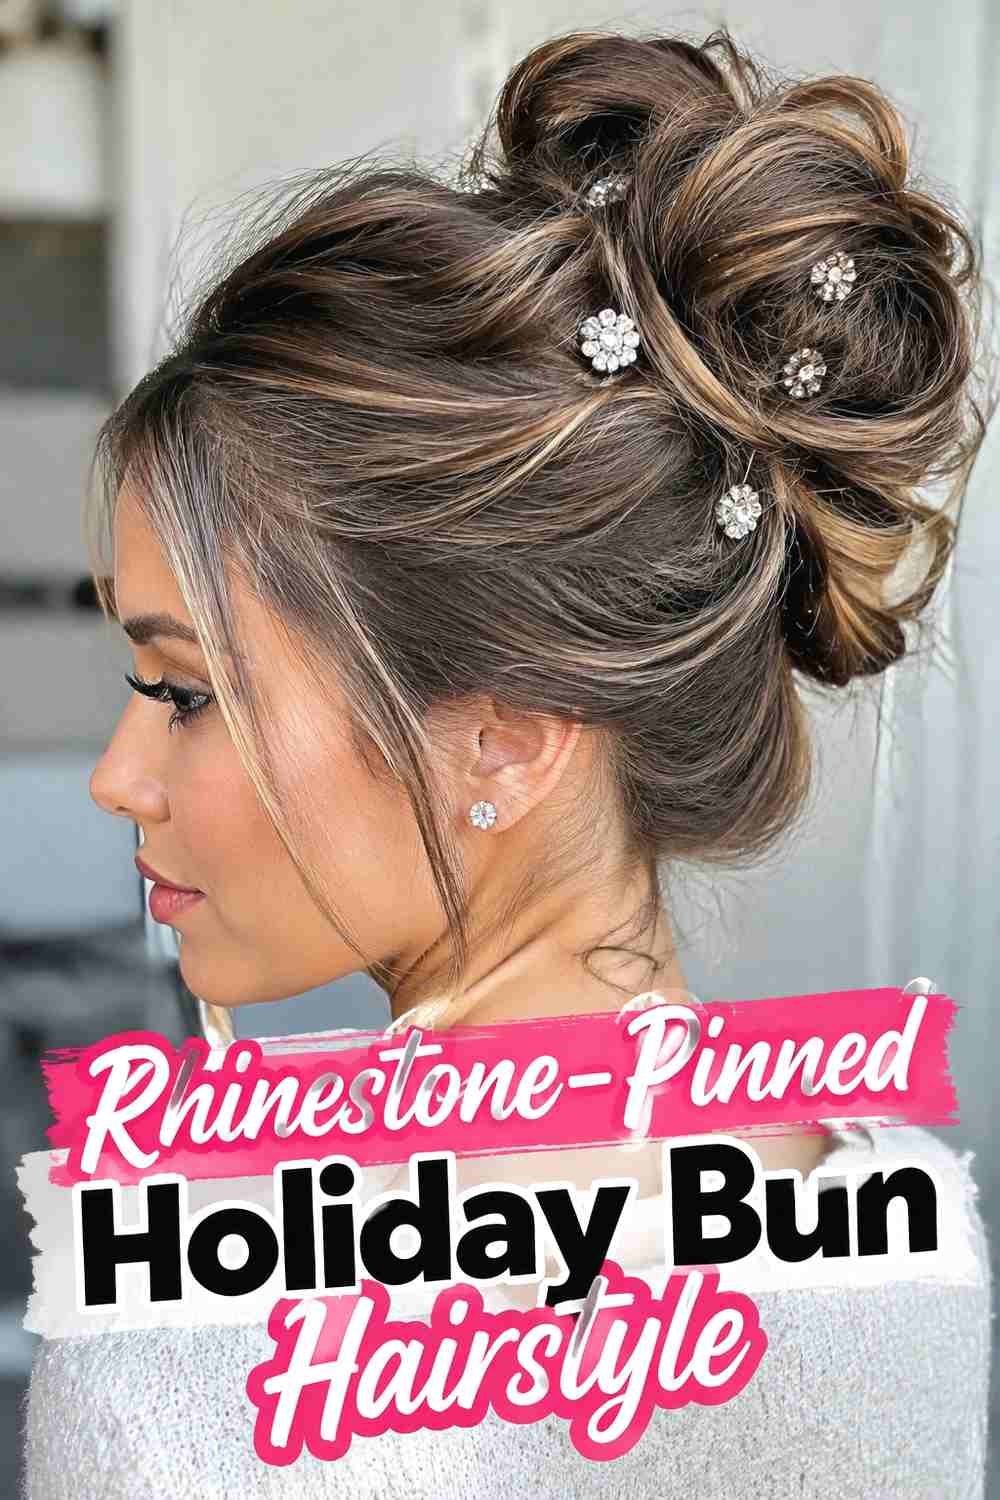
Rhinestone pins bring a brighter party-ready finish to a sleek bun, making them ideal for evening holiday events. Build a polished center-part bun first, then place a small number of sparkling pins around one side, along the upper edge, or near the base. Avoid covering every section with embellishment; a few concentrated points of light usually look cleaner and allow the sculpted hair shape to remain visible. The front should stay especially simple so the accessory detail feels intentional rather than busy. A glossy but believable finish complements the sparkle, while the bun placement can remain low or mid-height depending on your outfit and preferred level of formality.
Best For
This version works well for New Year’s parties, evening receptions, holiday dinners, and festive events where a little sparkle feels appropriate.
Pro Tip
Use decorative pins only after the bun is fully secured so they can be positioned for appearance rather than hold.
16. Soft Tendril Sleek Bun Hairstyle
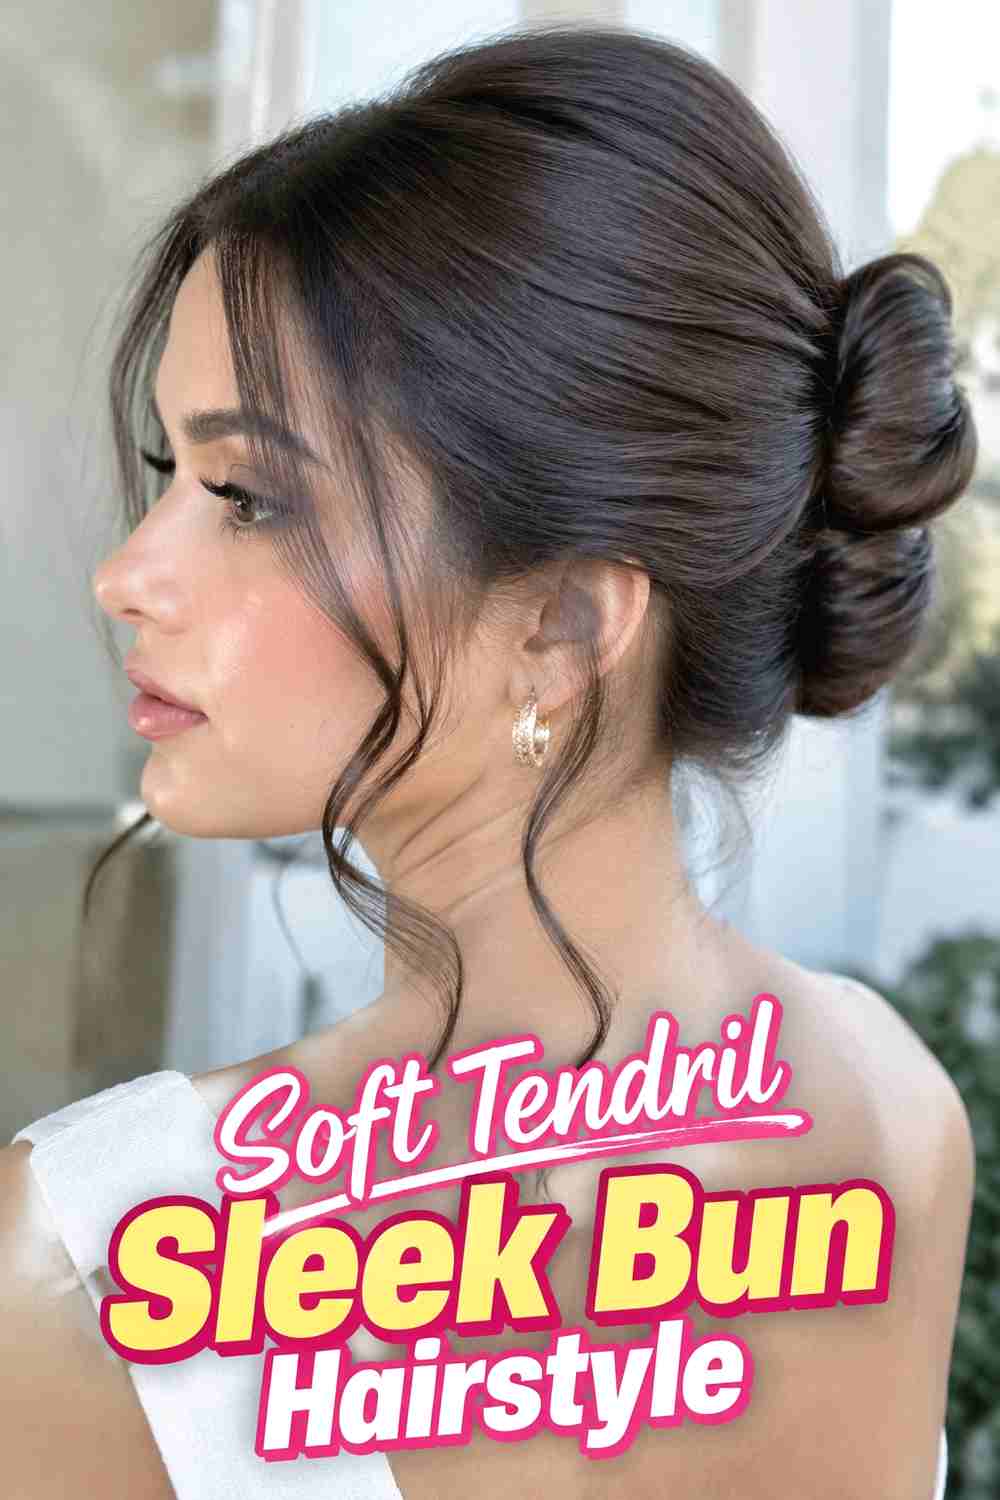
A sleek bun can still feel romantic when one or two fine tendrils are left free around the face. Keep the center part sharply defined and smooth most of the hair backward, but isolate the face-framing pieces before applying stronger hold products. The bun itself should stay polished and sculpted so the loose strands create a deliberate contrast rather than making the entire hairstyle look undone. Keep the tendrils narrow and softly bent instead of curling them into identical tight spirals. This variation works particularly well when a fully slicked-back front feels too severe. The result retains the elegant holiday structure of a center-part bun while introducing just enough softness around the face.
Styling Notes
Separate the tendrils before forming the ponytail. Pulling strands out afterward can disturb the smooth sides or create unwanted flyaways.
Best For
Choose this style for romantic dinners, weddings, portraits, and festive occasions where a softer front feels more natural.
17. Oversized Sculpted Bun Hairstyle
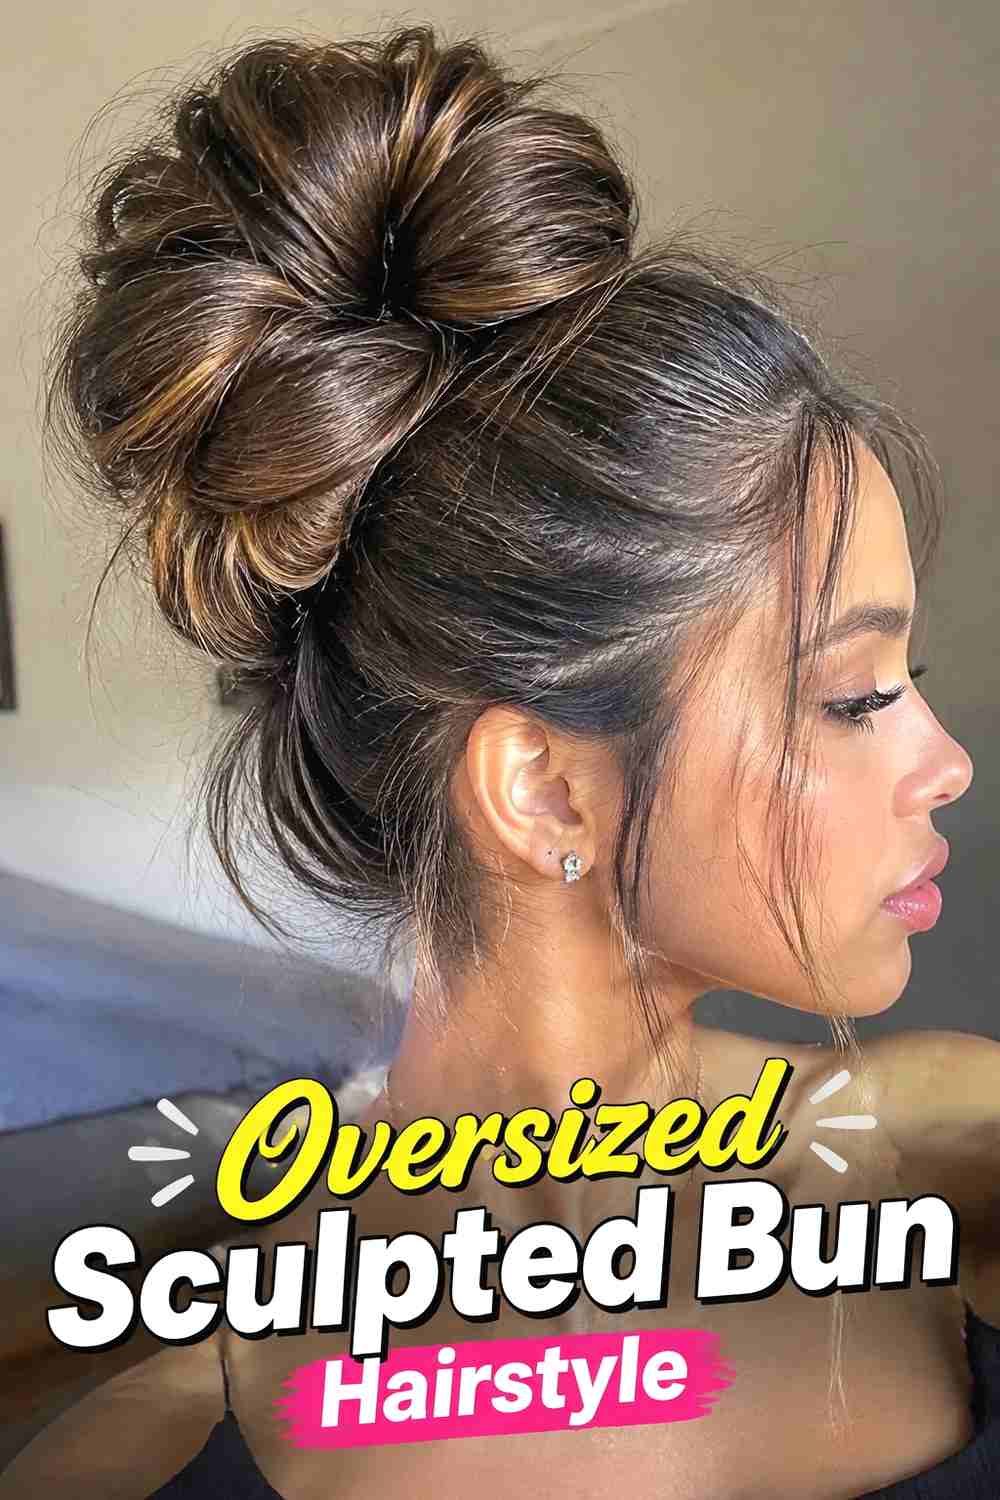
An oversized bun makes the strongest statement in the collection, pairing dramatic volume at the back with an exceptionally clean center part in front. Gather the hair into a secure ponytail and build the bun in sections rather than twisting all the length into one coil. Broad loops or folded panels create controlled volume while keeping the shape connected to the head. The crown and sides should remain smooth so the large bun does not compete with excess texture elsewhere. This approach works best when hair length and density can support the scale naturally. The finished style is especially effective with simple formal clothing because the sculpted silhouette becomes the main visual feature.
Hair Type & Length
Long or dense hair is best suited to this shape, although finer hair may need additional internal structure to create comparable volume.
Wear & Maintenance
Distribute the weight across multiple pins and avoid placing all the tension at a single ponytail point.
18. Minimalist Center Part Holiday Bun Hairstyle
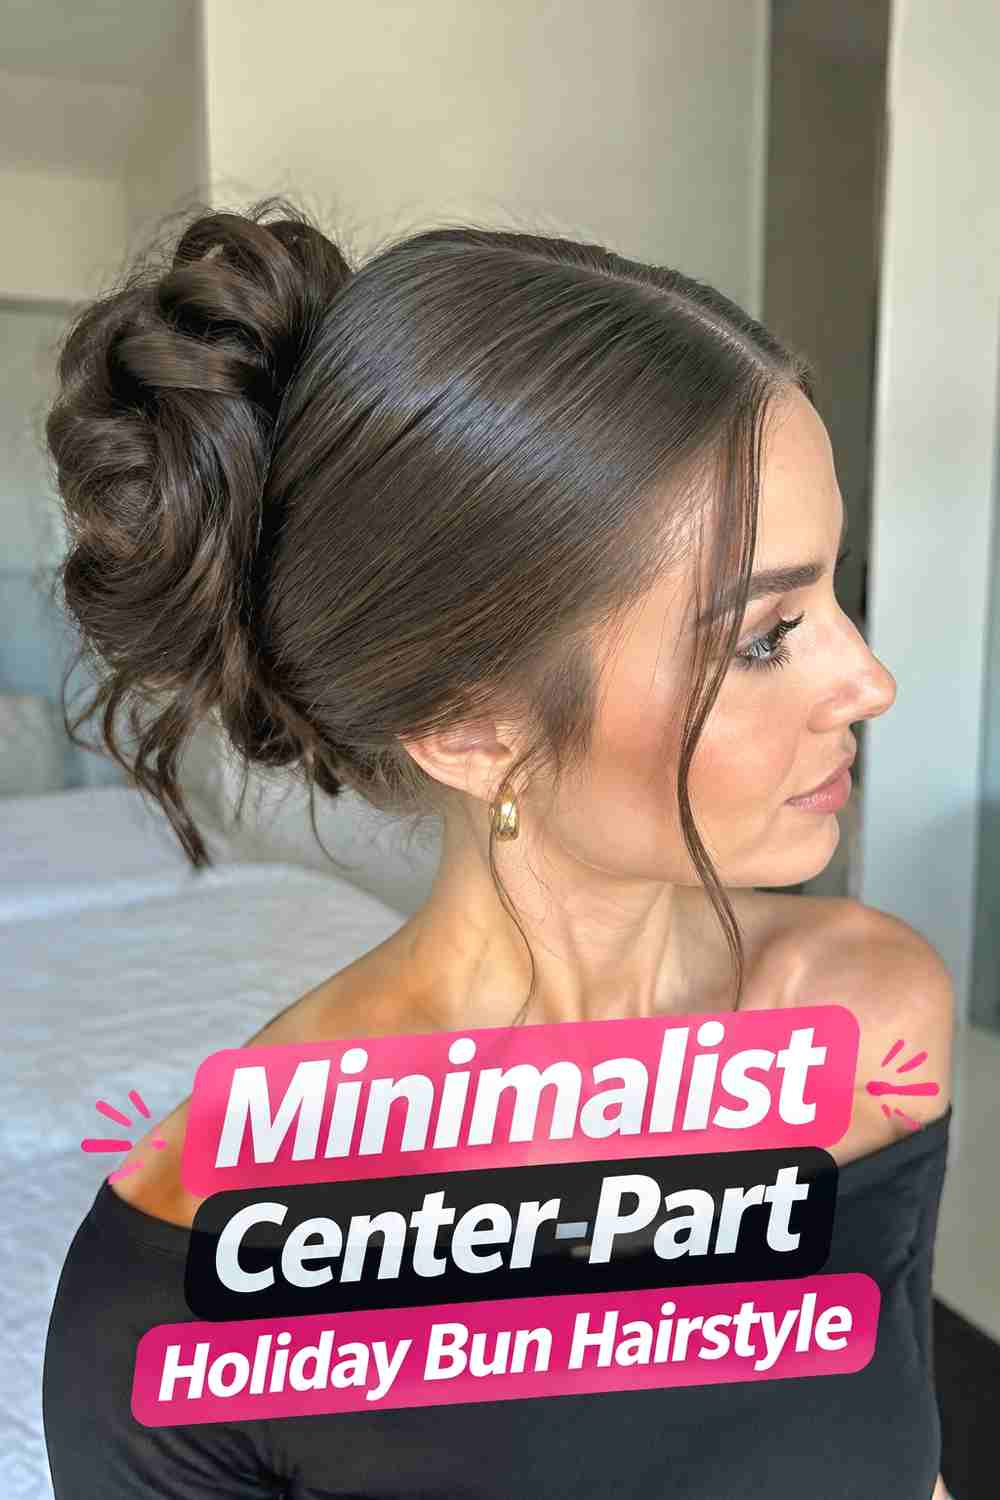
A minimalist center-part bun strips the holiday look down to precise lines, clean shine, and a compact sculpted shape. The part should be crisp from the center of the hairline toward the crown, with both sides smoothed evenly into a low bun. Skip decorative pins, ribbons, loose curls, and visible braiding so the quality of the finish becomes the main feature. The bun can be a simple twist, coil, or folded knot as long as it stays neat and proportionate. This style pairs especially well with bold jewelry, detailed clothing, or statement makeup because it does not compete for attention. Natural shine and controlled flyaways complete the polished effect.
Styling Notes
Check the center part from the front before securing the bun, since even a small shift becomes more noticeable in a minimalist style.
Best For
This is ideal for formal dinners, office parties, evening events, and modern holiday looks built around clean simplicity.
How to Choose the Right Look
Start with bun placement. Low buns feel refined and work beautifully with statement earrings, while mid-height buns can sit more comfortably above high collars. High and oversized buns create a stronger visual statement but may require more secure anchoring, especially with long or thick hair.
Hair density should also influence the construction. Fine hair often benefits from folded or looped shapes that preserve visible volume, while thick hair is easier to control when divided into sections before twisting or wrapping. Keep the center part crisp, but avoid excessive tension around the hairline.
For festive detail, choose one main accent. Pearls feel elegant, rhinestones add evening sparkle, velvet ribbons create seasonal softness, and small braids provide texture without extra accessories. If your outfit already has strong embellishment, a minimalist glossy bun may create the cleanest balance.
Final Thoughts
Holiday sleek buns look most polished when the center part, bun shape, and finish work together rather than competing for attention. Choose a placement that feels comfortable, build the bun according to your hair density, and use accessories selectively. Whether you prefer pearls, twists, braids, ribbons, or a completely minimalist finish, controlled shine and believable structure keep the hairstyle modern and wearable.
FAQs
1. How do I get a clean center part for a sleek holiday bun?
Create the part before gathering the hair and use the bridge of the nose as a visual center reference. Smooth each side separately so the line stays defined while you form the ponytail.
2. Which bun placement works best with holiday outfits?
Low buns pair especially well with open backs and statement earrings, while mid-height buns can work better with high collars. High buns create more drama and keep the neckline completely clear.
3. Can fine hair create a sculpted sleek bun?
Yes. Folded loops, layered knots, and lightweight texture products can help create a fuller-looking bun without relying on heavy teasing or excessive product.
4. How can thick hair stay secure in a sleek bun?
Use a strong ponytail base, divide the length into sections, and secure the bun with multiple sturdy pins so the weight is distributed instead of concentrated in one place.
5. What accessories look best with holiday sleek buns?
Pearl pins, rhinestone accents, velvet ribbons, and small decorative clips all work well. Keep the accessories limited so the sculpted center part and bun shape remain clearly visible.
Save your favorite holiday sleek bun hairstyle, share these polished ideas, and explore more festive hairstyle inspiration for your next celebration.